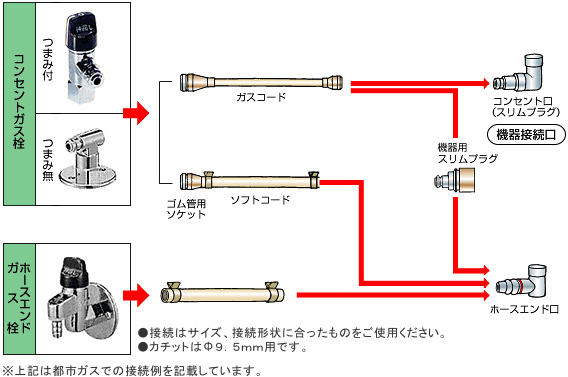
ガス栓とガス器具の接続について


| 接続の前に、まずガス栓やガス機器の接続部の形状をご確認ください。 |
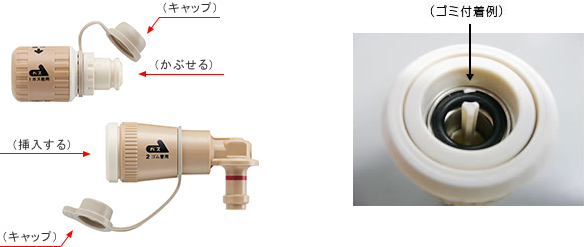
| ・サイズ・接続口に合ったものをご使用ください。無理な接続はガス漏れ、火災などの原因になります。 ・ガス接続部に傷がついたり、異物が付着するとガス漏れの原因となりますので、ていねいに清潔にお取扱い ください。また、接続していないときは、ガスコードや機器の接続部はキャップをはめてください。 ・接続時には、ごみなどの異物がないことを確認して、確実に接続してください |


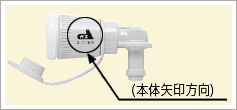
・本体矢印方向にガスが流れるように接続してください。ガスの流れる方向を矢印方向と反対にするとガス漏れをおこします。
・古くなったり汚れがひどくなるとガス漏れにつながる恐れがありますので、7年を目安に新しいものとお取替えください。(製造年月は本体に表示)


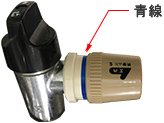
露出型のガス栓の場合はソケットを取り付けた後に青線が見えることを確認してください。
青線が見えていない場合は差込みが不充分となっているため、再度差し込んでください。

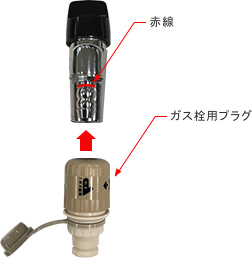
①ガス栓用プラグをホースエンドの赤線がかくれるまで充分差し込んでください。差込不足はガス漏れにつながる恐れがあります。
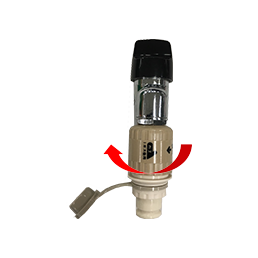
②ガス栓用プラグの本体カバーを矢印の方向に回して、しっかりと締めこんでください。


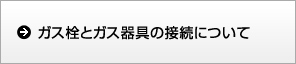
御使用しない場合はキャップを必ず、かぶせてください。かぶせないと、ゴミ・ホコリ等が付着し使用時に、ガス漏れをする恐れがあります。付着した場合は、交換してください。
 |  |
 |  |
 |  |